Step 1: Download the Freenas .iso image and burn it into a dvd. Insert the dvd and power on the physical server to be used. This could also be a virtual machine for testing purposes.

Step 2: Select the disk to be used for the installation.

Step 3: Click on Yes when asked to proceed. This will delete any existing data.

Step 4: Wait a few minutes for the installation to finish.
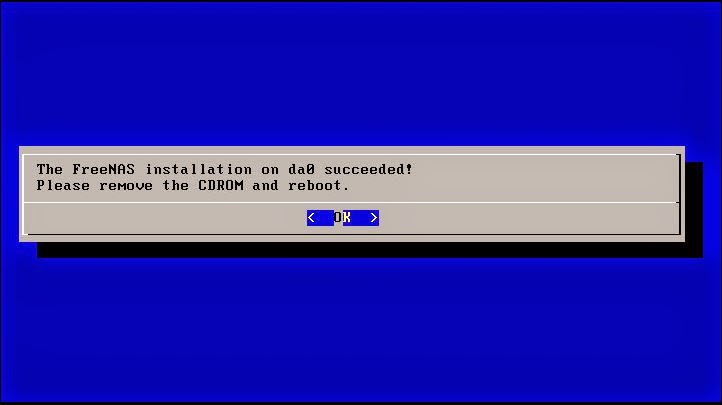
Step 5: Reboot the Freenas server.

Step 6: Use the menu that you see when the machine boots up to provide freenas with a network identity. Option "1" and "7" were used in this case.

Step 7: Launch your browser and connect to the ip address of the freenas server. Provide a password if you reset the default password during the initial configuration.

Step 8: Turn on the necessary services (such as NFS, ISCSI and so forth). Notice NFS and ISCSI were not enabled initially by default.


Step 10: Go to Shares and add a Unix Share.


ISCSI over ZFS Configuration:
Step 1: Make sure to enable the Iscsi Service.

Step 2: Create a ZFS volume using an unused disk.

Step 3: Add a zvol (zvol1) inside of the volume just created.

Step 4: Create a Portal and call it portal1.

Step 5: Add an Iscsi initiator.

Step 6: Add an Iscsi target (target1) and associated it to your portal and initiator.

Step 7: Add an extent (extent1) and map it to your zvol1.

Step 8: Add Associated Targets.

Final Note: Make sure to test the configuration using the vsphere client.

No comments:
Post a Comment
Note: Only a member of this blog may post a comment.