The Vcenter Appliance in 6.0 has gone through changes. The new installation and configuration steps have changed. No more deploying via OVF, no port 5480 for configuration. Here are the steps. Make sure to update your DNS records prior to start.
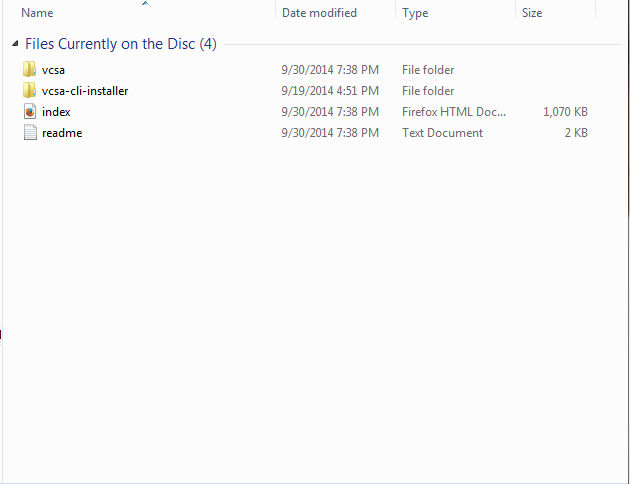
Step 1: Download and burn the software. Open up the folder and install the Client Integration Plugin. Afterwards, start the setup of the appliance by selecting the index.html option. This option has been renamed in the GA release. It is now called vcsa-setup.
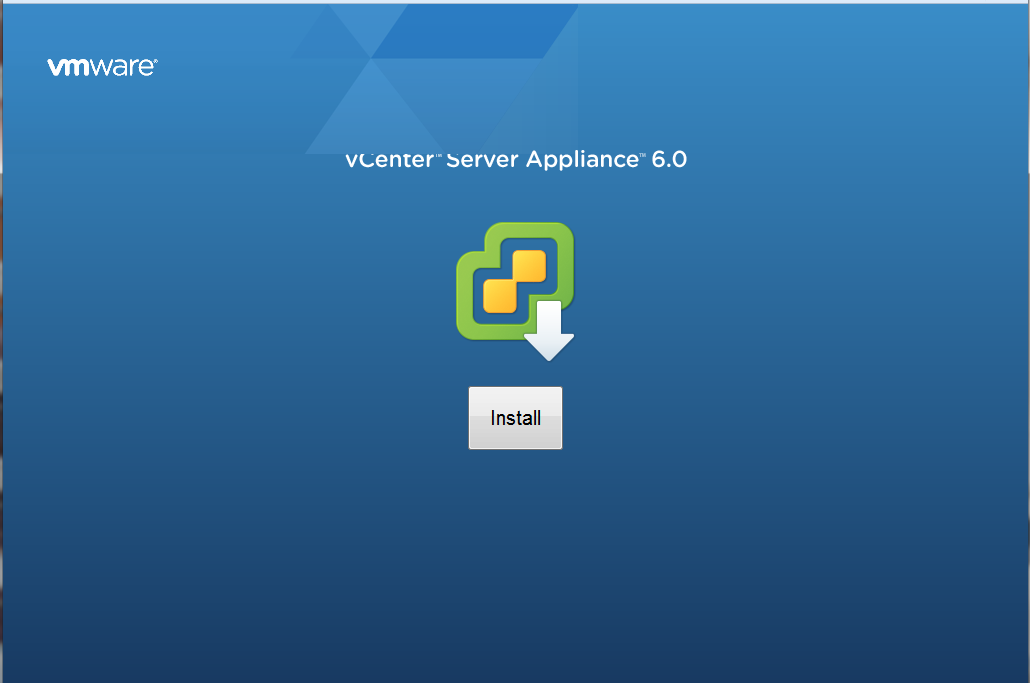
Step 2: Click on Install. The GA release also has a choice to Upgrade.
Step 3: Agree to the EULA and proceed.

Step 4: Specify the information of the esxi host that will host the appliance.

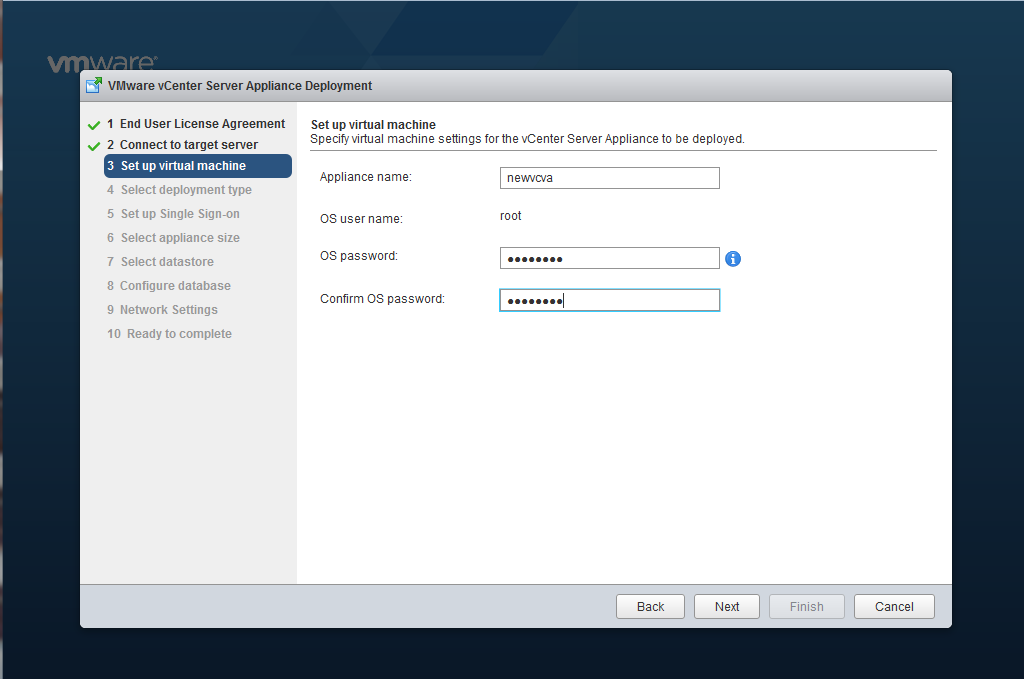
Step 5: Add the root password for the appliance.
Step 6: Configure the appliance with the embedded PSC.

Step 7: Configure the SSO credentials.

Step 8: Notice the choices for the size of the appliance. The default will use 2 vcpus and 8 gbs.

Step 9: Select the datastore to store the appliance.

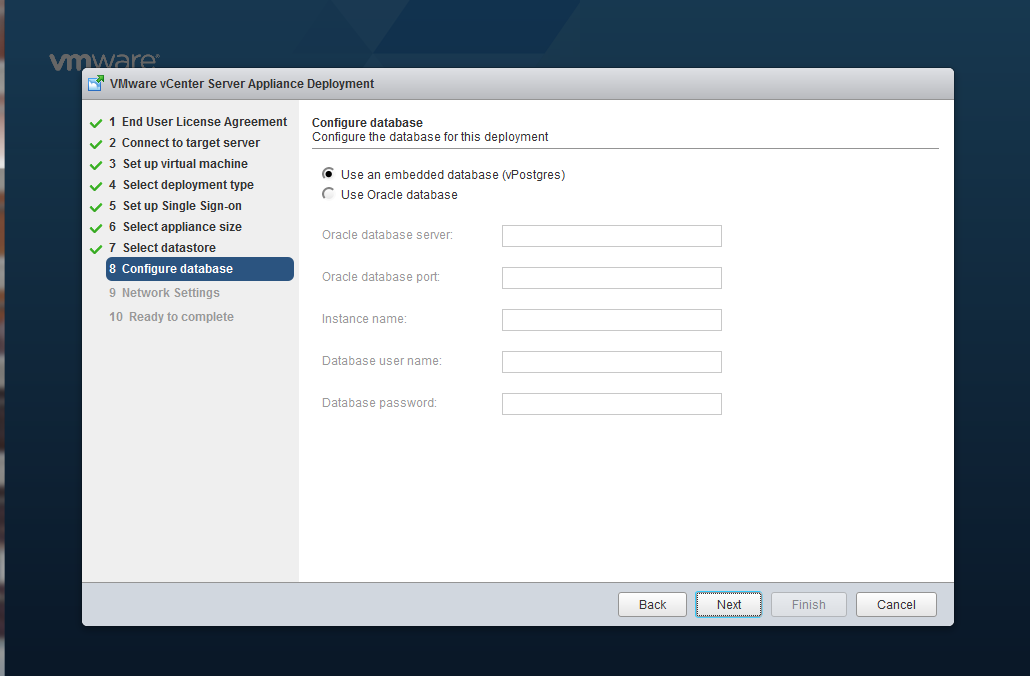
Step 10: Decide which database to use. The embedded database or Oracle.
Step 11: Specify the attributes of the vCenter appliance.

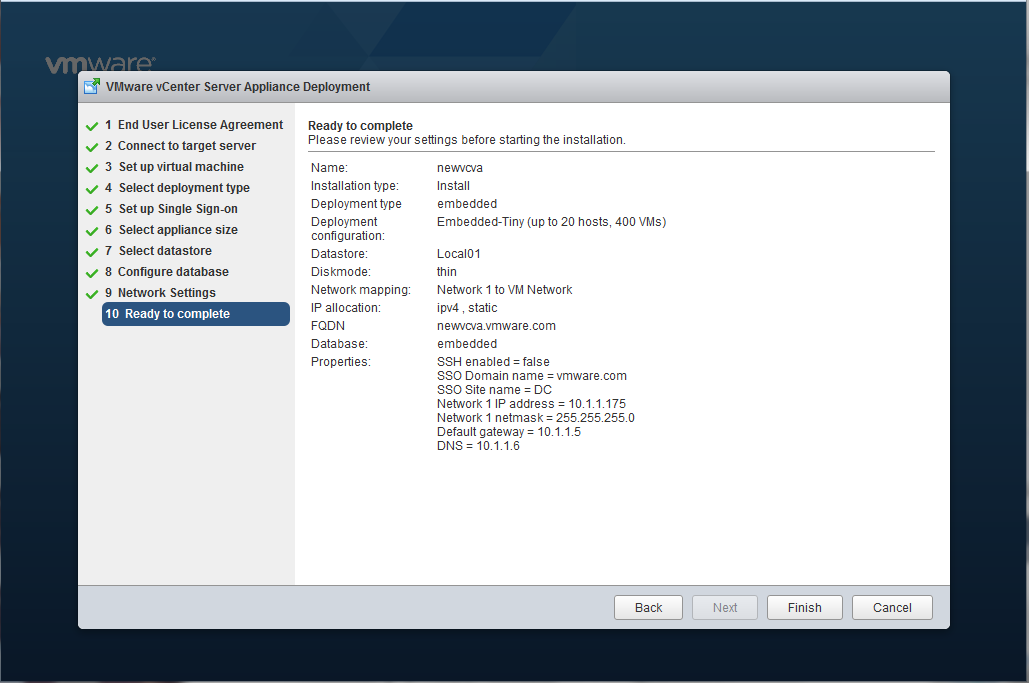
Step 12: Click on Finish to start the installation. It will take a while.
Step 13: Open up the console of the appliance and log into as you would in an esxi host (F2). You will see the equivalent of the DCUI for the appliance. Test it by pointing your browser to the IP (no more port 9443). Ex: https://newvcva.vmware.com/vsphere-client.
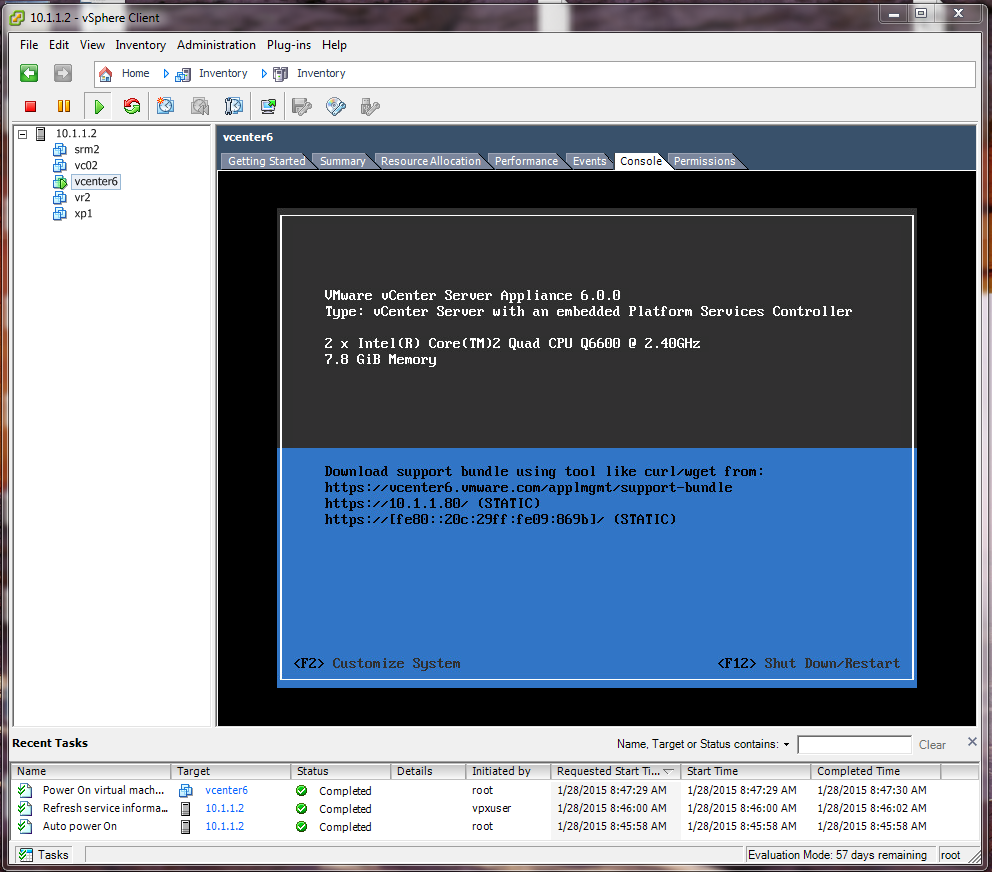
Note: The last capture belongs to another appliance previously created.
No comments:
Post a Comment
Note: Only a member of this blog may post a comment.